Scope of functions #
- Live preview for GLB export
- Define visibility of objects
- Animation overview for naming and organization
- Annotation overview for quick text editing
- Conversion of particle systems to animation
- Check objects for mesh errors and clean them up
- Simplified access to export settings
Installation #
Preparations #
The Blender software is required to use the add-on. This must be downloaded and installed beforehand. If Blender has already been installed once before, you also have the option to apply existing settings.
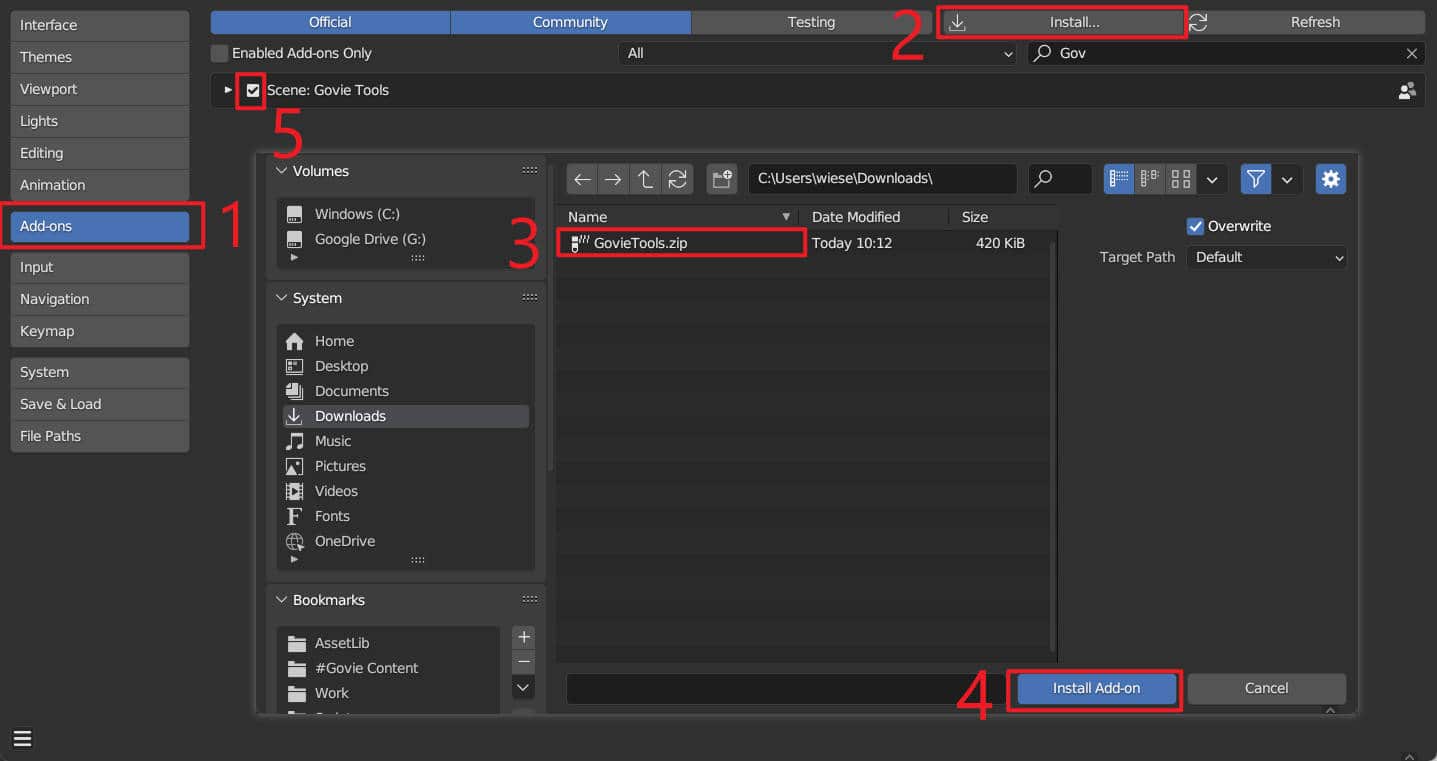
Now you need to download and install the Govie Tools add-on. To do this, open Blender and select Settings from the Edit menu at the top.
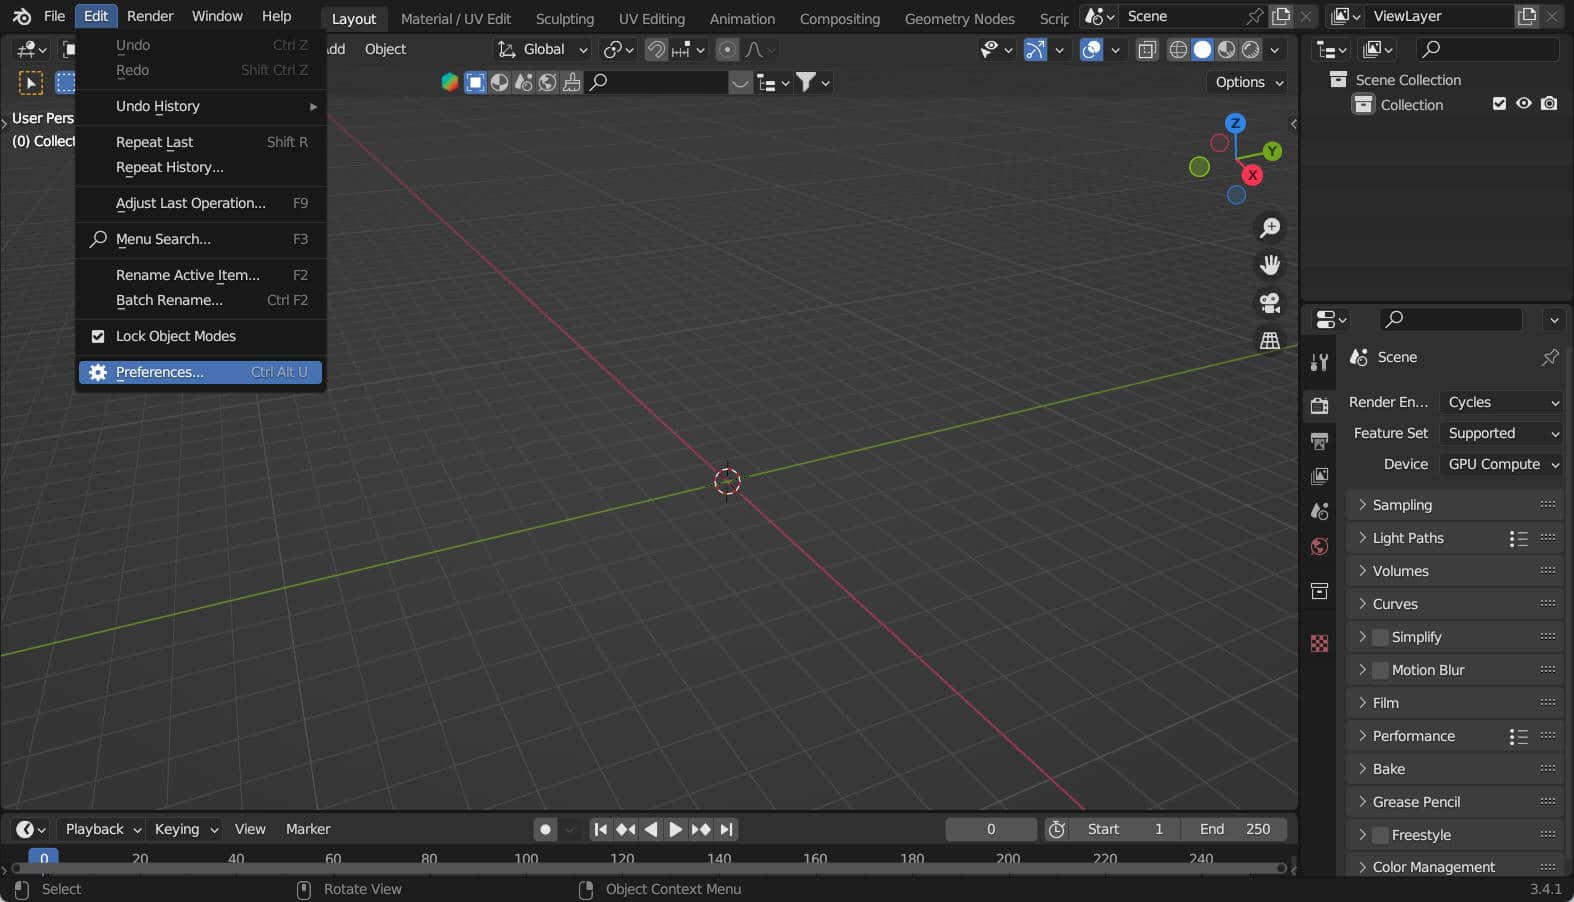
Govie Tools Install #
First switch to the Add-ons item in the menu on the left. Now click Install and select on your hard disk the file named Govie-Tools.zip, which you have downloaded before. Now click on Install Add-on and the Govie Tools add-on will appear with the list of installed add-ons. The last thing to do is to check the box in front of the add-on to activate it.
Govie Tools Benefit #
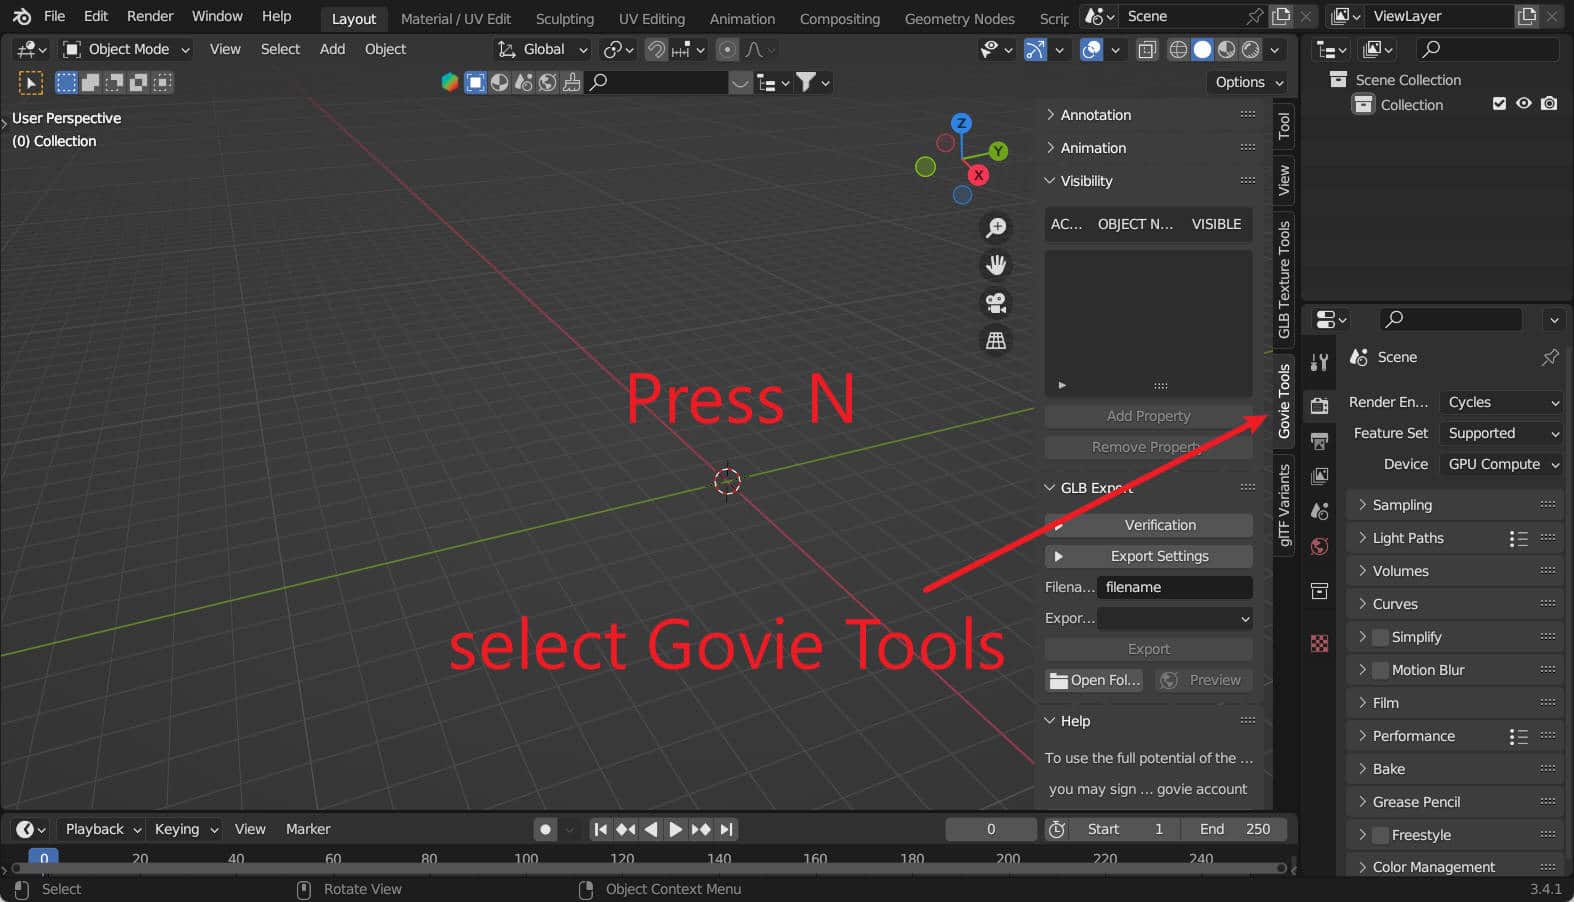
The Govie Tools add-on can now be found in the Porperty panel on the right side of the 3D view. If it is not visible, press the N key on the keyboard. Make sure beforehand that the mouse is also in the 3D view area, since shortcuts in Blender are context sensitive and trigger different commands in the different windows.
Preview #
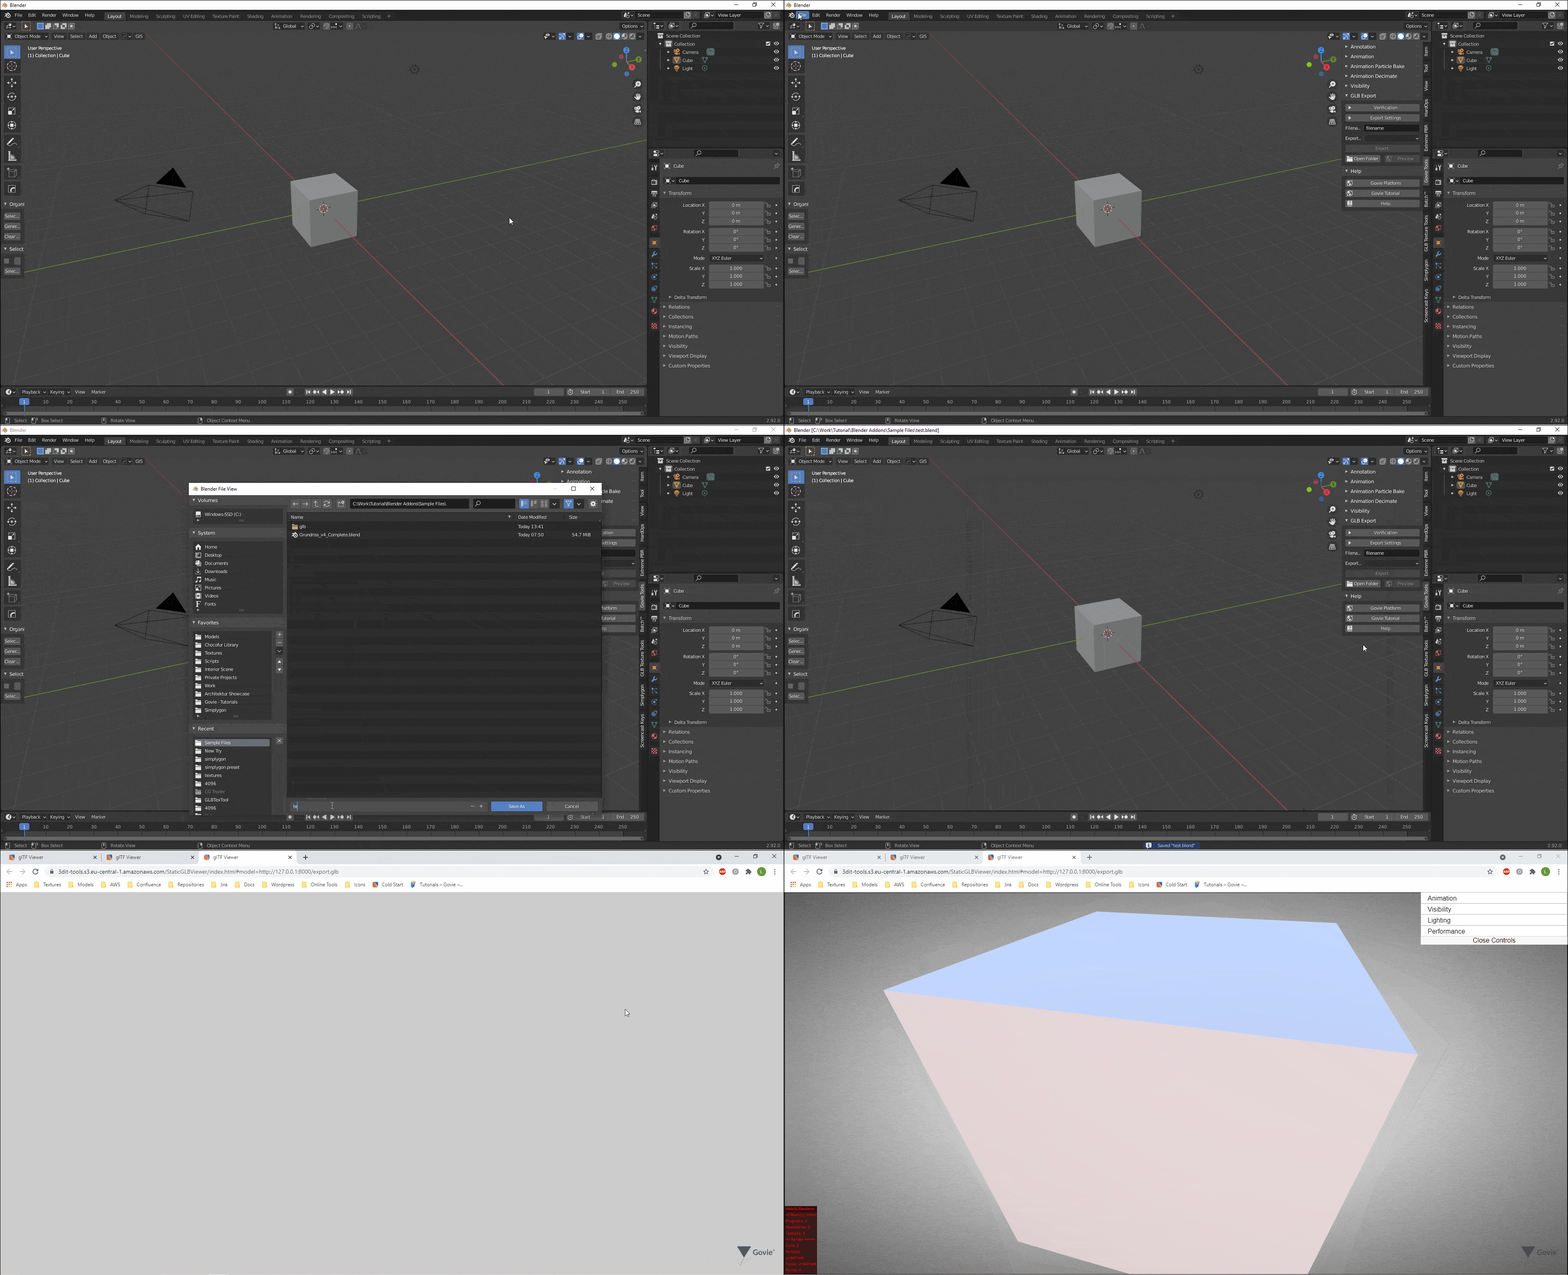
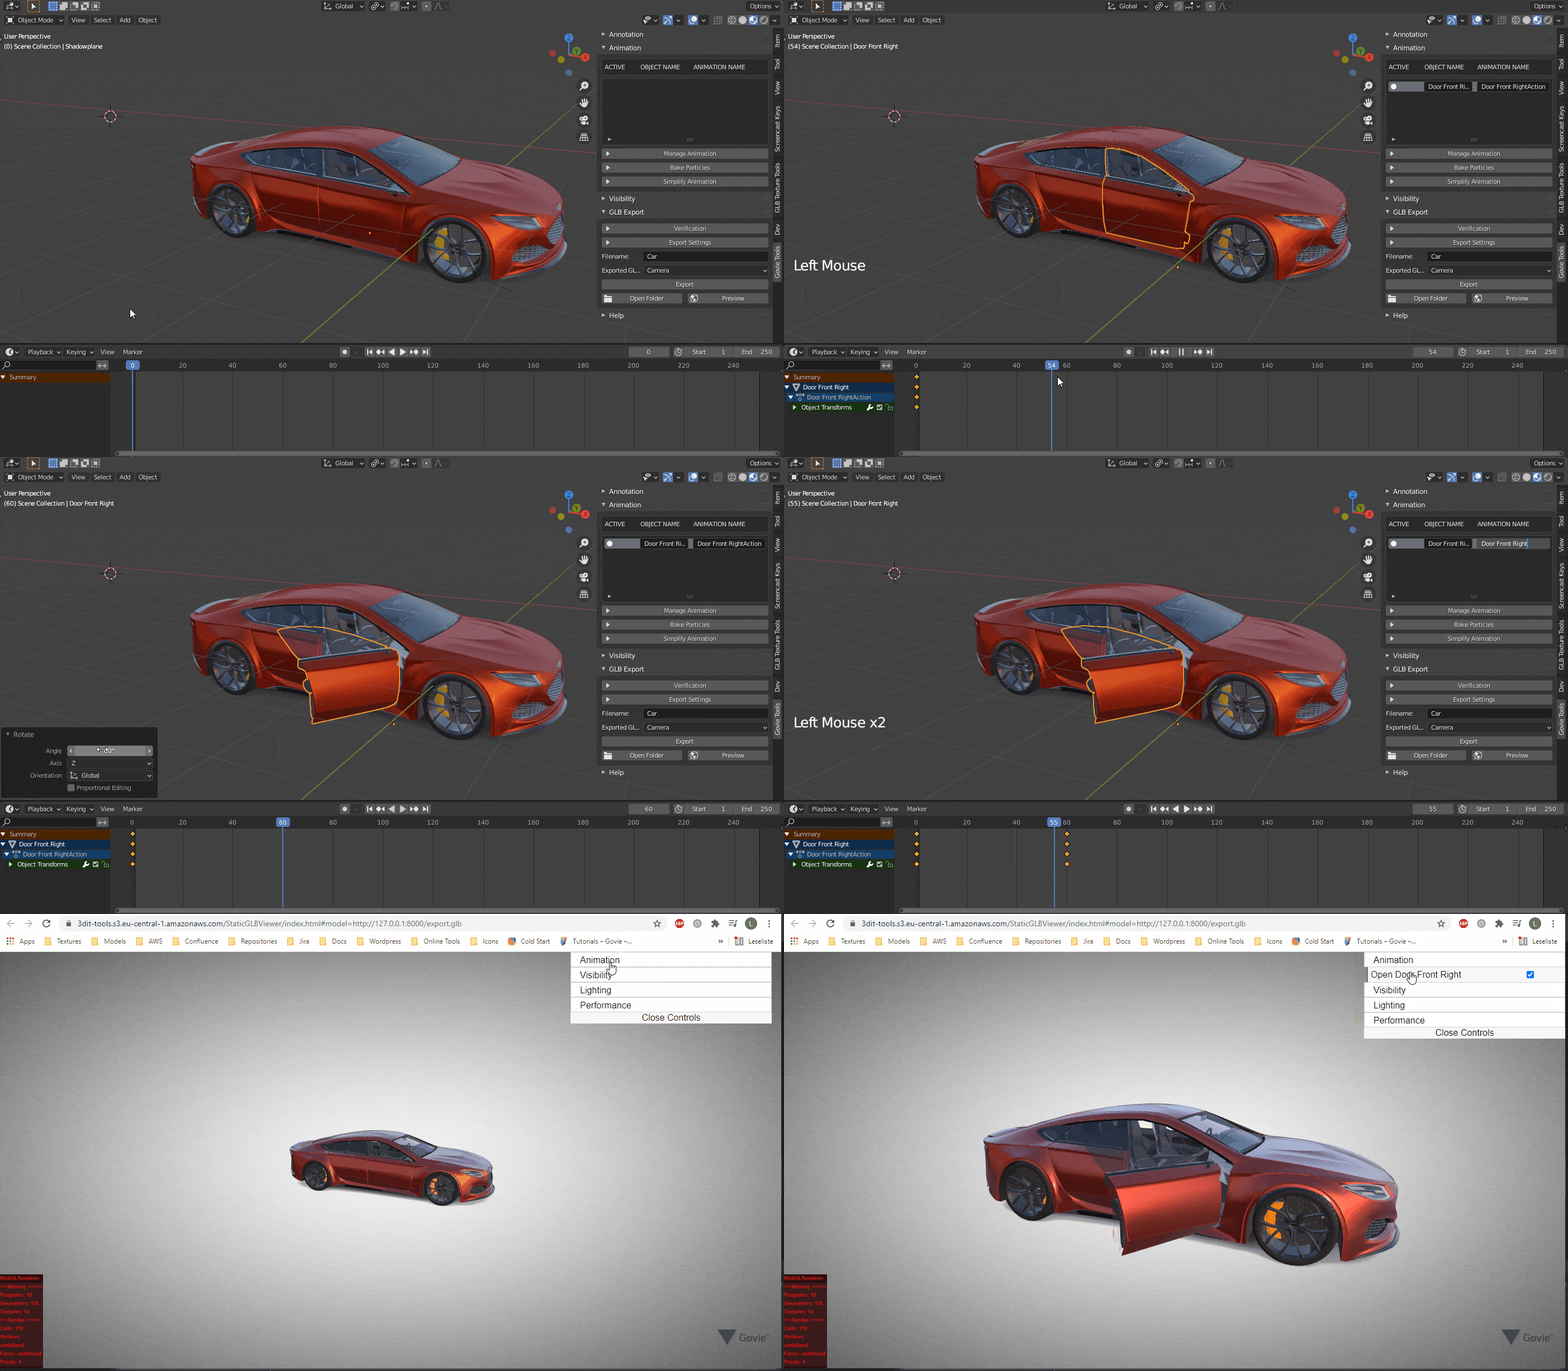
The Quick Export function, including preview, allows the model to be reviewed without having to upload it to the Govie platform each time.
-
to be able to use the export function, the current blend file must be saved
-
now the export button can be clicked, which exports the model to the GLB folder
-
after exporting the GLB, the file name appears in the drop-down list
-
by clicking on Preview the model can now be viewed in the browser
Visibility #
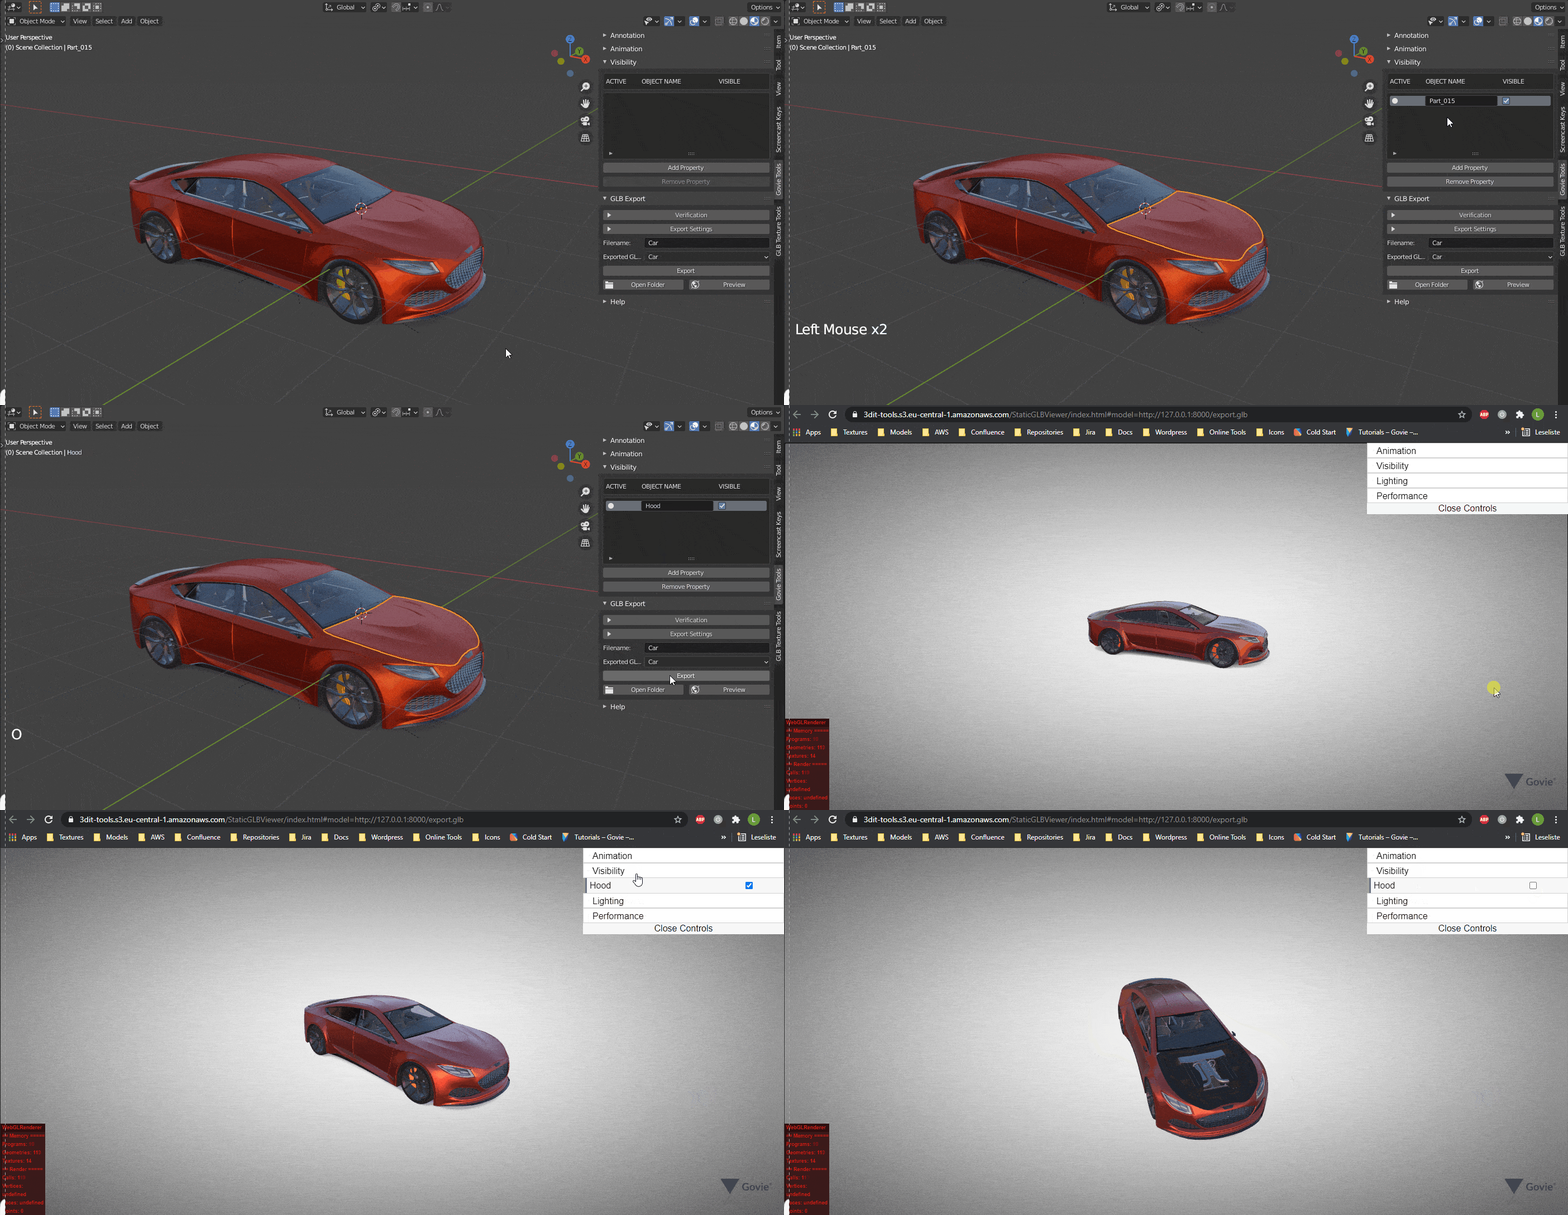
The Visibility property can be used to set the visibility of an object in Govie. In the preview, function and naming can be quickly checked.
-
Select the object in the scene and click Add Property in the Visibility menu.
-
after the export, the entered file name appears as the current entry in the drop-down list
-
in the preview you can now test the visibility
-
if everything is correct, the file can be uploaded later to the Govie platform
Visibility - Grouping #
If visibility is set for a parent object, this also affects the child objects. Empty objects can thus be used to create visibility groups that can be used to hide or show several objects at the same time.
-
Create Empty object, which serves as a helper object for grouped objects
-
select the desired objects and finally the Empty object
-
with CTRL+P you can now create a parent-child relationship
-
finally all objects are selected and exported
-
alternatively, the whole scene can be exported if select only has been deactivated in the export settings
Animation #
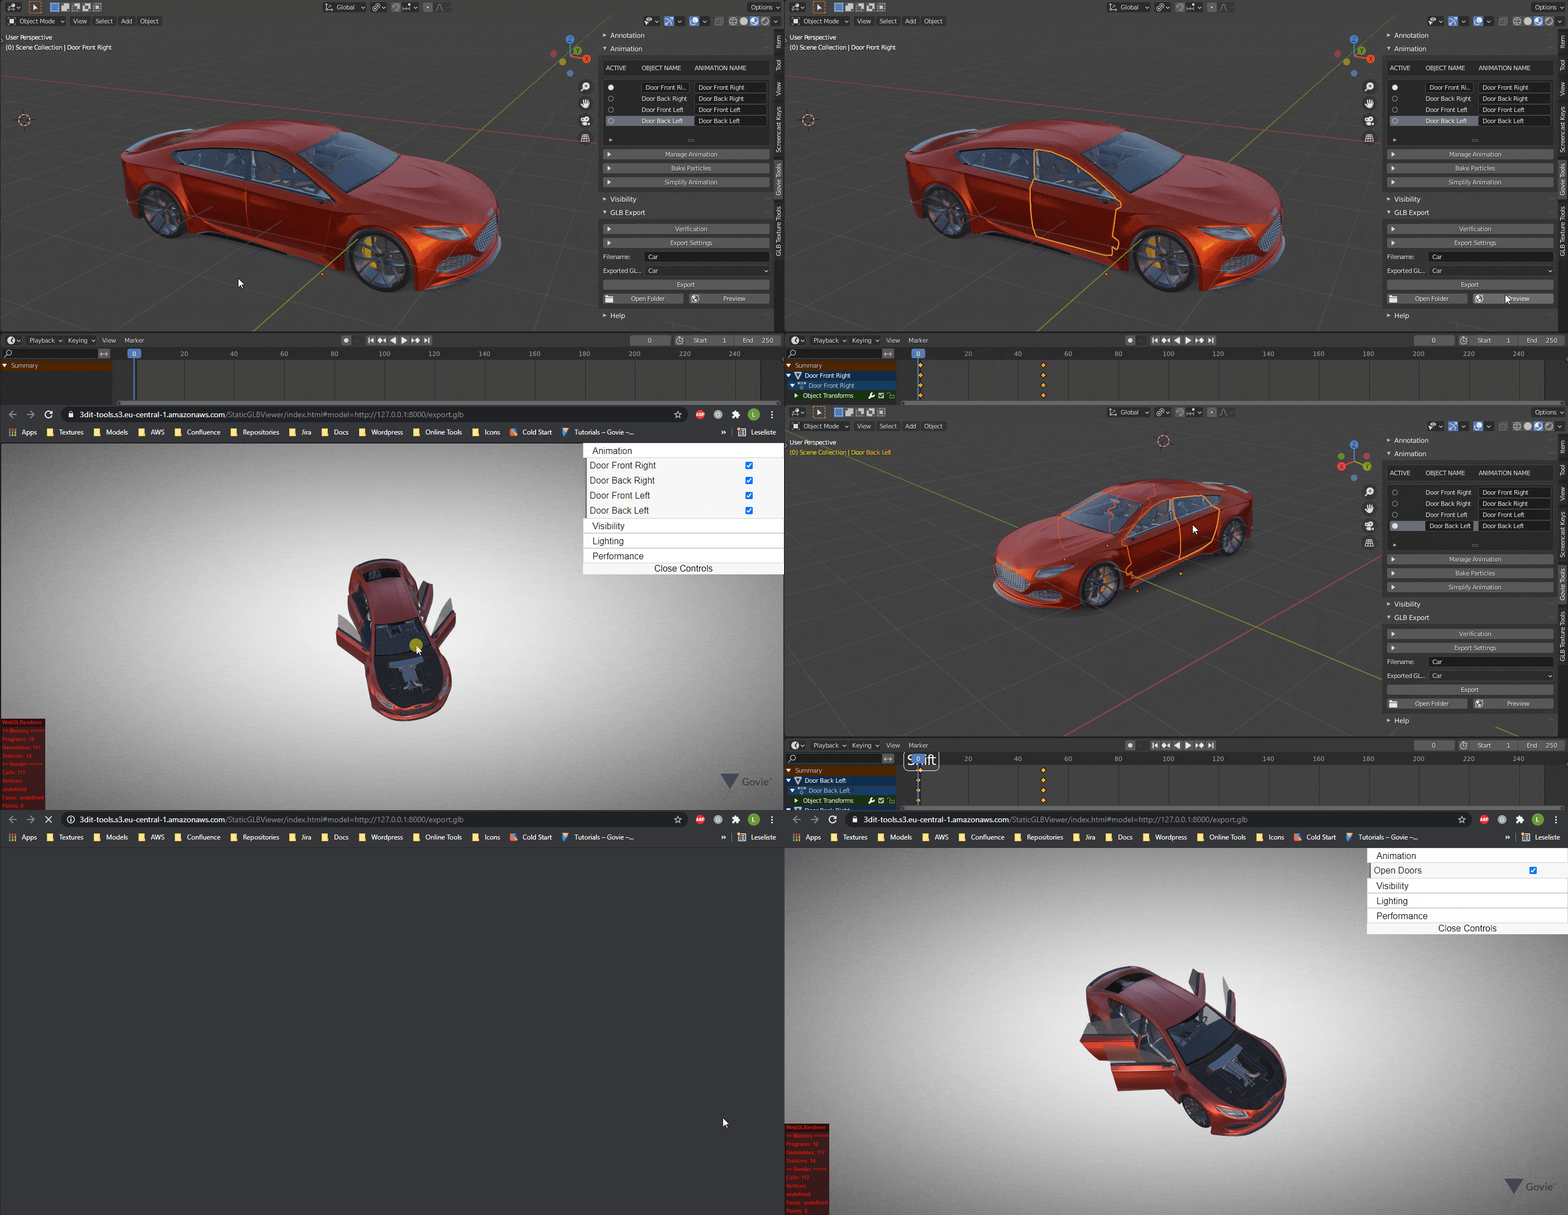
The animation menu provides a direct overview of all animated objects. Here you can easily edit the identifiers of the objects and their animations.
In addition, animations can be combined and dissolved again. The dynamic display contains only animations of the currently visible objects. Particle systems can also be beaconed and simplified via keyframe reduction.
-
open the animation menu
-
as soon as a keyframe is set, a new entry appears in the animation list
-
the title of the animation can be edited conveniently
- after the export the animation title is found again in the preview
Animation - Summarize #
Multiple animations can also be easily merged, renamed and split again.
-
several animations can be combined to one NLA track
-
to do this, select all objects whose animations are to be combined
-
open the Manage Animations menu and join the animations with Join Animation
-
with Rename Animation the combined animation can be renamed
-
with Seperate Animation the merging can be undone
Animation - UV Animation #
UV animations can be used to move textures on a surface.
- download the template for testing
- Assign material
- if no UV has been assigned for object yet, Unwrap must be performed
- Move UV map in X or Y direction to test correct direction
- Create Empty
- Create Custom Property
- The name of the property is uvAnim, the value is the name of the object whose UV is to be animated.
Animation - Bake Particles #
Particle systems can also be transferred to Govie. For this purpose, however, they must first be converted into an appropriate form.
- create a particle system
- in the render tab, select an object that will act as a particle instance
- in Govie Tools under Animation open the menu Bake Particles
- Frames – every how many frames a keyframe should be set
- Key Location (recommended) – set keyframe for the position
- Key Rotation – if rotation is set in the particle system, it makes sense to store it in the instances as well
- Key Vis ibility – if you do not want to display particles that do not yet exist or have already expired, the visibility should be keyed
- Key Scale – necessary for Key Visibility to work
Add Description #
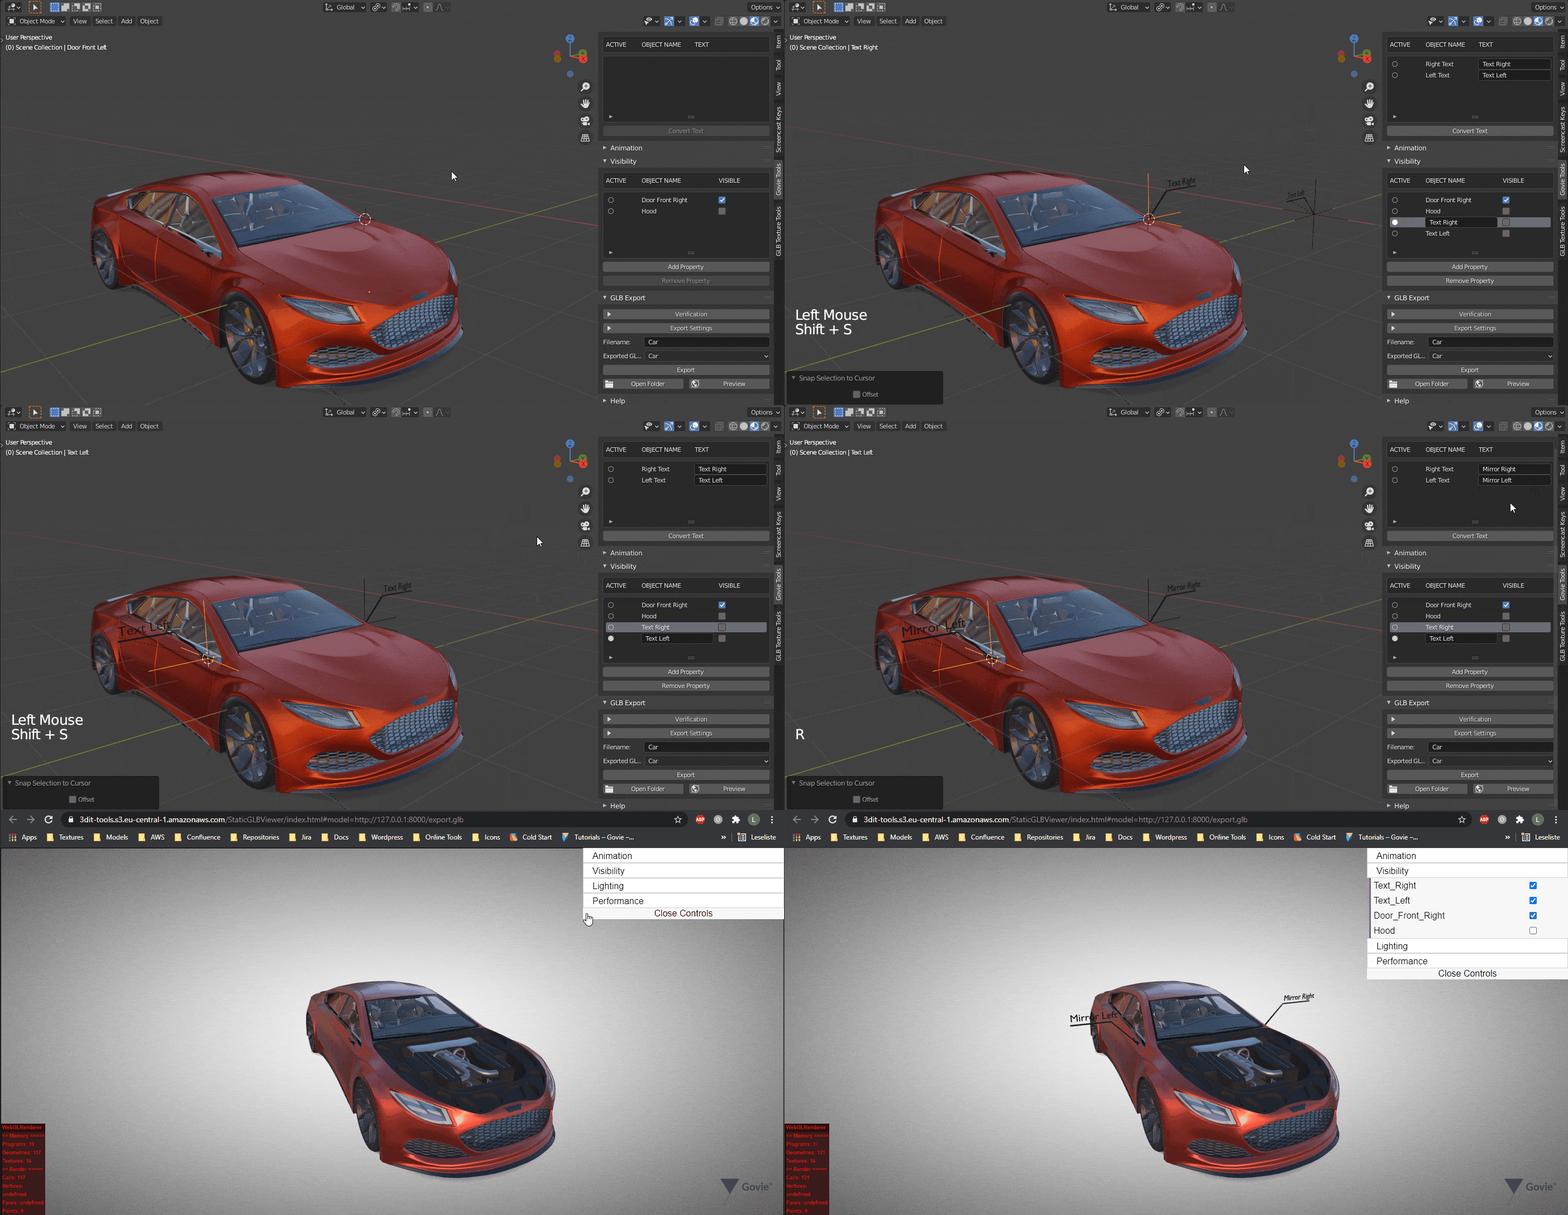
The annotation menu provides a compact overview of all texts in the scene. In the template there is a ready-made text object, which can be easily added to the current project.
-
Create text or add the pre-made labels
-
Position text using the Empty object
-
Edit text easily via annotation menu
-
Make text fade in and out via visibility property

